-
neovim の設定を見直す 2026年1月の陣書こうかな、と。 それにあたって、 neovim 周りの設定を全体的に見直し。 - lazy.vim を導入 - vim-plug を使っていたのを lazy.nvim に。 - clau2026-01-06(Tue)
-
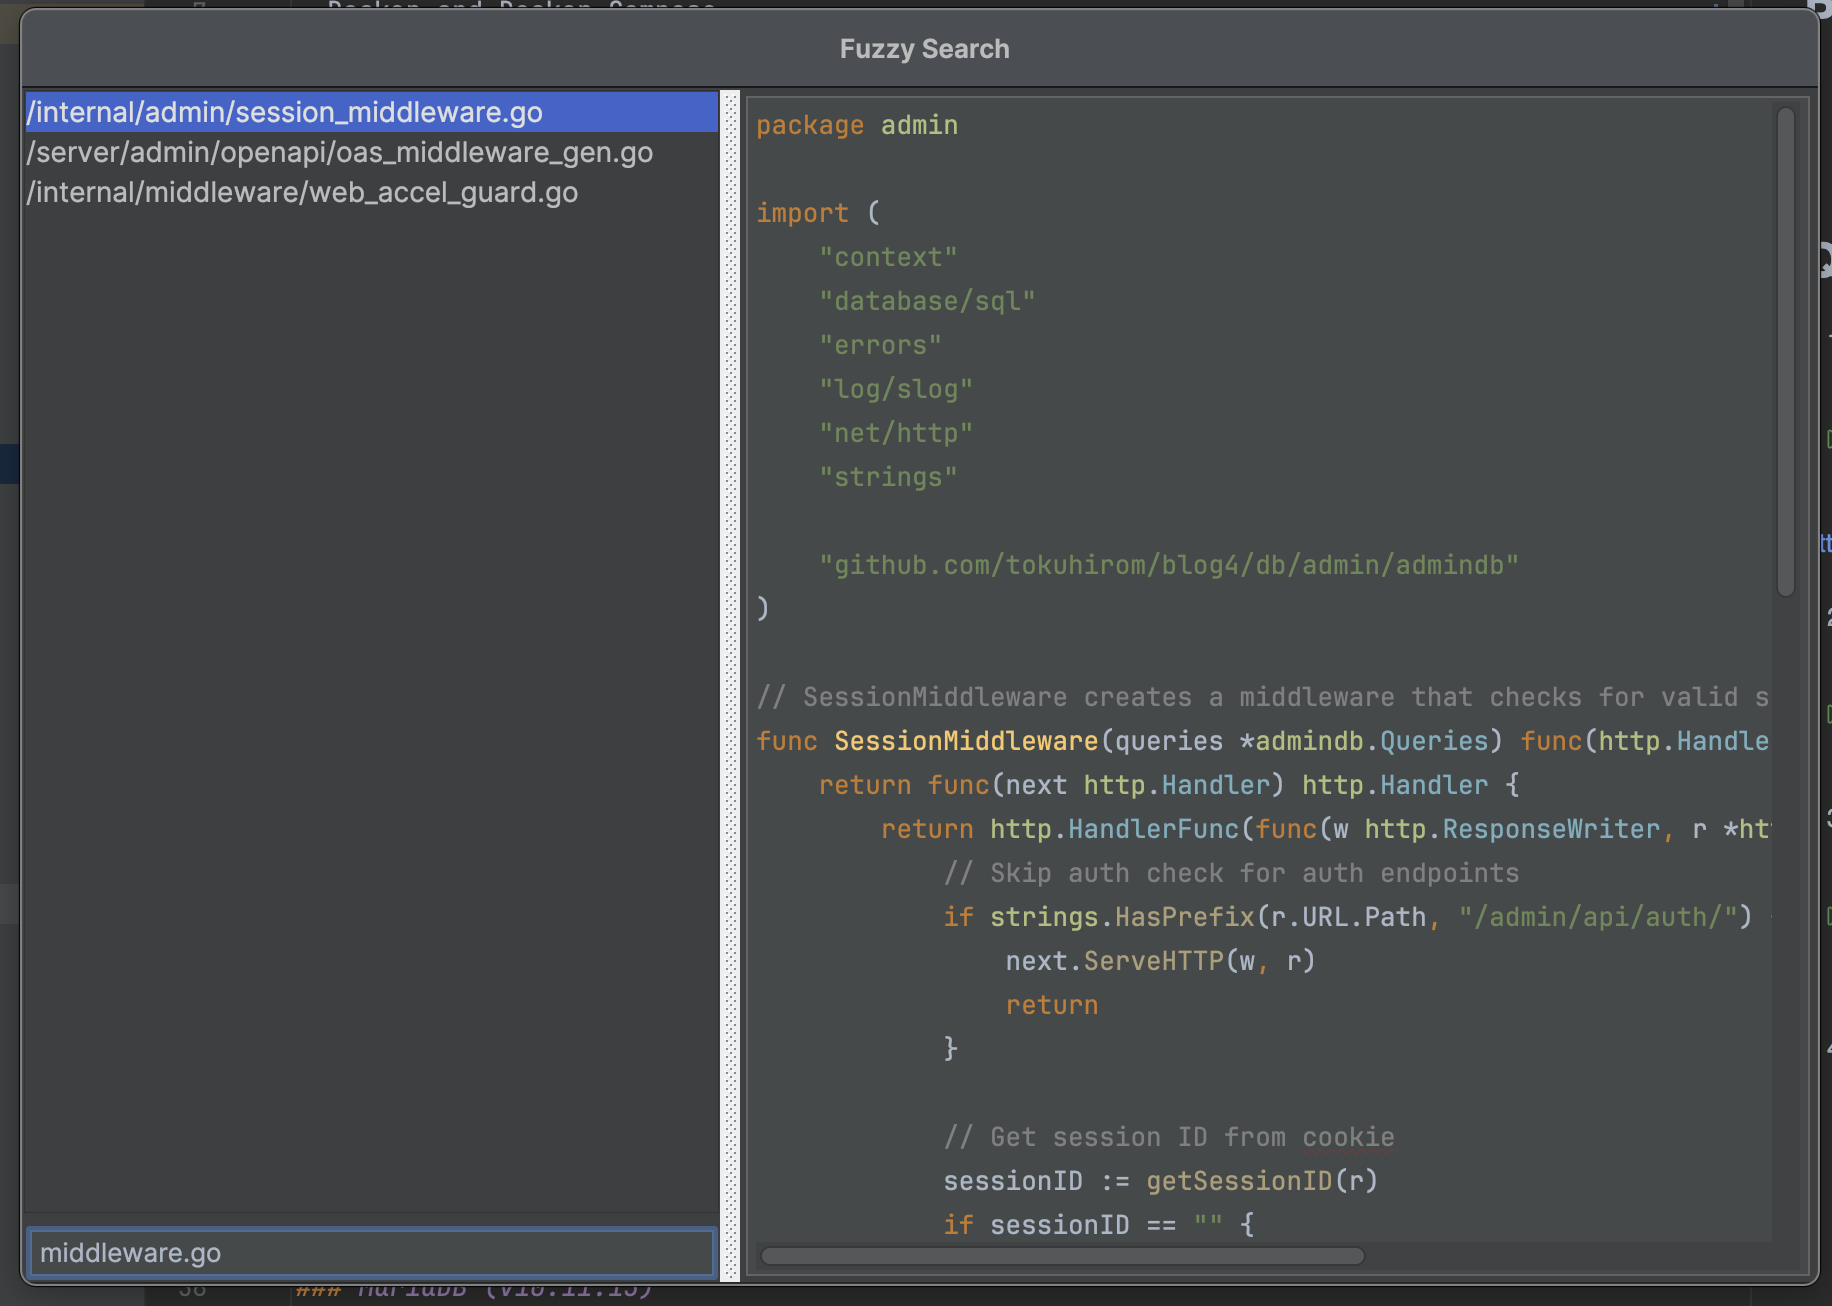
blog4 admin での検索が微妙だったのを直したスマホから検索ができてない。と思ったが、、そもそも PC でも検索できてなかった。 E2E テストを playwright でも再実装させたので、これでもう壊れないことでしょう。2026-01-05(Mon)
-
otelcol の receiver/fluentforward に PR 送ったのがマージされたreceiver/fluentforward には問題があった。otelcol では SIGHUP を送ると既存のコネクションを閉じて、新しいコネクションを開き直さないといけないのだが、それが r2026-01-05(Mon)
-
deskpad良さそう。試してみたい。 ```sh brew install deskpad ``` でインストール完了。 `/Applications/Deskpad.app` が出来る。 もう一枚仮2026-01-03(Sat)
-
Best Buy 2025# Amazon Fire HD 8 Kids Pro [asin:B0CVDMCD3T:detail] 子ども用のタブレット。自分のアカウントで買った本を子供用アカウントに貸与したりすることも可能2026-01-03(Sat)
-
oxcrust 製の js toolkit。良さそう。 次回は biome じゃなくて oxc 使ってみようかな?2025-12-29(Mon)
-
blog4 の 2025 年末大改修。htmx ベースへの移行。現行のブログシステムは blog4 という名前になっている。基本的には実装するプログラミング言語を変えるタイミングで名前を変えていて、現在の世代は Go で書かれている。 ## API 周りを ty2025-12-29(Mon)
-
colimaを使うdocker desktop じゃなくて colima にしようかな、と。 ``` brew install colima docker brew services start colima ```2025-12-26(Fri)
-
2025年末の homebrew 大掃除``` ❯ brew list ==> Formulae abseil harfbuzz libxcb prometheus act helix libxdmcp protobuf2025-12-24(Wed)
-
zellij を始めるzellij は tmux とか GNU screen のようなターミナルマルチプレクサ。rust で書かれてるっぽくて、UI がリッチ。 昔は GNU screen を使っていて、最近は tmux2025-12-24(Wed)
-
debug-httpd に sleep と status のエンドポイントを作った$DAYJOB でコンテナ実行環境を作成していたわけですが、その際に動作確認のために必要なコンテナイメージとして作っていたのが debug-httpd です。 環境変数やサーバー側の情報を返すエ2025-12-19(Fri)
-
if your ultimate hacking keyboard 80 doesn't workupdate the firmware! USB dongle can update the firmware with the UHK Agent2025-12-17(Wed)
-
ボダラン4やったラファで一通り。 安定してボダラン、という感じで良かった。2025-12-10(Wed)
-
curl で DNS resolve の IP だけ差し替える``` --resolve ホスト名:ポート番号:IPアドレス ``` see2025-12-08(Mon)
-
ansible 2.19.0 以後で `skipping vars_file item due to an undefined variable` が出るときansible 2.19.0 以後では variable の validation が以前よりも strict になっている。 結果として、 ``` - hosts: foo become: t2025-12-08(Mon)
-
Outer Worlds 2 をクリアシステムとしては Outer World と同じ感じ。Fallout 風味のFPS RPG。アクションは前作とそんなに変わらず。 ストーリーがOuter World 1 の方が楽しかったかなぁ。あんま2025-11-17(Mon)
-
nip.io & sslip.io が便利`52.0.56.137.nip.io` のようにすると `52.0.56.137` が A レコードで引けるような DNS サーバー。2025-11-14(Fri)
-
testify の require.Eventually が便利テストを実装する際に、ミドルウェアの起動を待って何回かリトライしたい場合がある。そういう場合には tesitfy の require.Eventually が便利。 ```go require.Ev2025-11-14(Fri)
-
Fuzzier という JetBrains 系IDE で使えるプラグインが便利2025-10-06(Mon)
-
冷やし C# 始めましたC# が話題だったので、改めて hello, world から入っていきます。 ```sh brew install dotnet-sdk ``` から入っていきます。 ``` ❯ dotne2025-09-19(Fri)
-
G-SHOCK DW-H5600-2JR を購入2025-09-14(Sun)

-
fluent-bit の out_opentelemetry の通信部分のコードこのへんにありました。2025-09-01(Mon)
-
ashron という coding agent を作っているコーディングエージェントの乗り換えに右往左往するよりは、自分で作った方が楽しいというか、今の段階なら自分で作ったりして遊べる期間な気がするので、作ってみている。 golang で bubblete2025-08-30(Sat)
-
systemd の RuntimeDirectorysystemd には RuntimeDirectory という機能がある。service 起動時にディレクトリを作ってくれる。 `/run/` 以下にディレクトリを置いて、unix socket2025-08-19(Tue)
-
goland で wsl2 を使う方法に設定マニュアルがある。 色々と書いてあるが、Ubuntu を使う場合、普通に WSL2 をセットアップし、WSL 領域にクローンしたプロジェクトを使えば普通に動く。 ということになる。 もっ2025-08-17(Sun)
-
uAutopagerize を入れるGPD Win では、カーソルの移動が通常のPCよりも操作性が悪いため、記事を読む効率を上げるために uAutopagerize を入れる。 ちなみに、プライベートではブラウザは Firefox2025-08-16(Sat)
-
GPD Win で feedly を読むfeedly をリビングでサクサク読みたいが、ノートPCは、諸般の事情で持ち込みづらいため、GPD in 5 を導入する。 feedly はショートカットキーを使うのが便利なわけだが、gpd win2025-08-16(Sat)
-
docker を snap で入れると制約が多いこのへん。 デスクトップでなんとなくコンテナを動かすぐらいにしか使う予定がなかったマシンだったので、なんとなく snap を使って docker をインストールしたのだけど、最近は dcv とい2025-08-16(Sat)
-
dcv を homebrew-tap に対応させたdocker container の様子を見る TUI ツールである dcv というツールを作っている今日この頃。 なかなか便利になってきているのだが、インストールが面倒だった。 そこで、gorel2025-08-12(Tue)
-
UHK60 が bricked したけどファームウェアがリカバリできて助かった話ちょっと、自分が UHK 60 に最適化されすぎていて他のキーボードだとかなり厳しいという状況になっている。 ショートカットキーが無限に設定できて最高便利すぎるので。。親指の位置にトラックパッドが置い2025-08-12(Tue)
-
さくらのクラウドのモニタリングスイートのサンプルコードを書いたOtel を使うサンプルが公式ドキュメントに無かったので書いて置いておきました。 テスト用にダミーデータを生成するスクリプトも同梱しています。2025-08-11(Mon)
-
Psycopg 3AI が 2 出してくるから 2 使ってたけど 3 出てた。2025-08-01(Fri)
-
開発に使う Python スクリプトは uv で管理する```python3 #!/usr/bin/env -S uv run --script # /// script # requires-python = ">=3.11" # dependencie2025-07-24(Thu)
-
スナイパーエリートレジスタンスクリア2025年7月17日に一通りクリア。シャープシューターでさっくりと。 毎度のことながら、序盤が厳しい。静音スナイパーとかが揃ってからが本番、という感じ。 良くも悪くも毎回同じ味がするゲーム。 最終2025-07-18(Fri)
-
postgresql の docker image は初期化後に再起動するpostgresql の公式 docker イメージは、`/docker-entrypoint-initdb.d` にファイルを置くことで初期化出来る。 postgresql のイメージは初期化2025-07-16(Wed)
-
/tmp がファインダーで勝手に開かれる怪現象なんか最近、 /tmp に sysdiagnose_2025.07.09_11なんとかかんとか.tar.gz が作られて Finder で /tmp がオープンされるっていう謎の挙動が起きてて困ってた2025-07-09(Wed)
-
【取り込み済み】gover-html の見た目をよくする PR を送った2025-07-06(Sun)
-
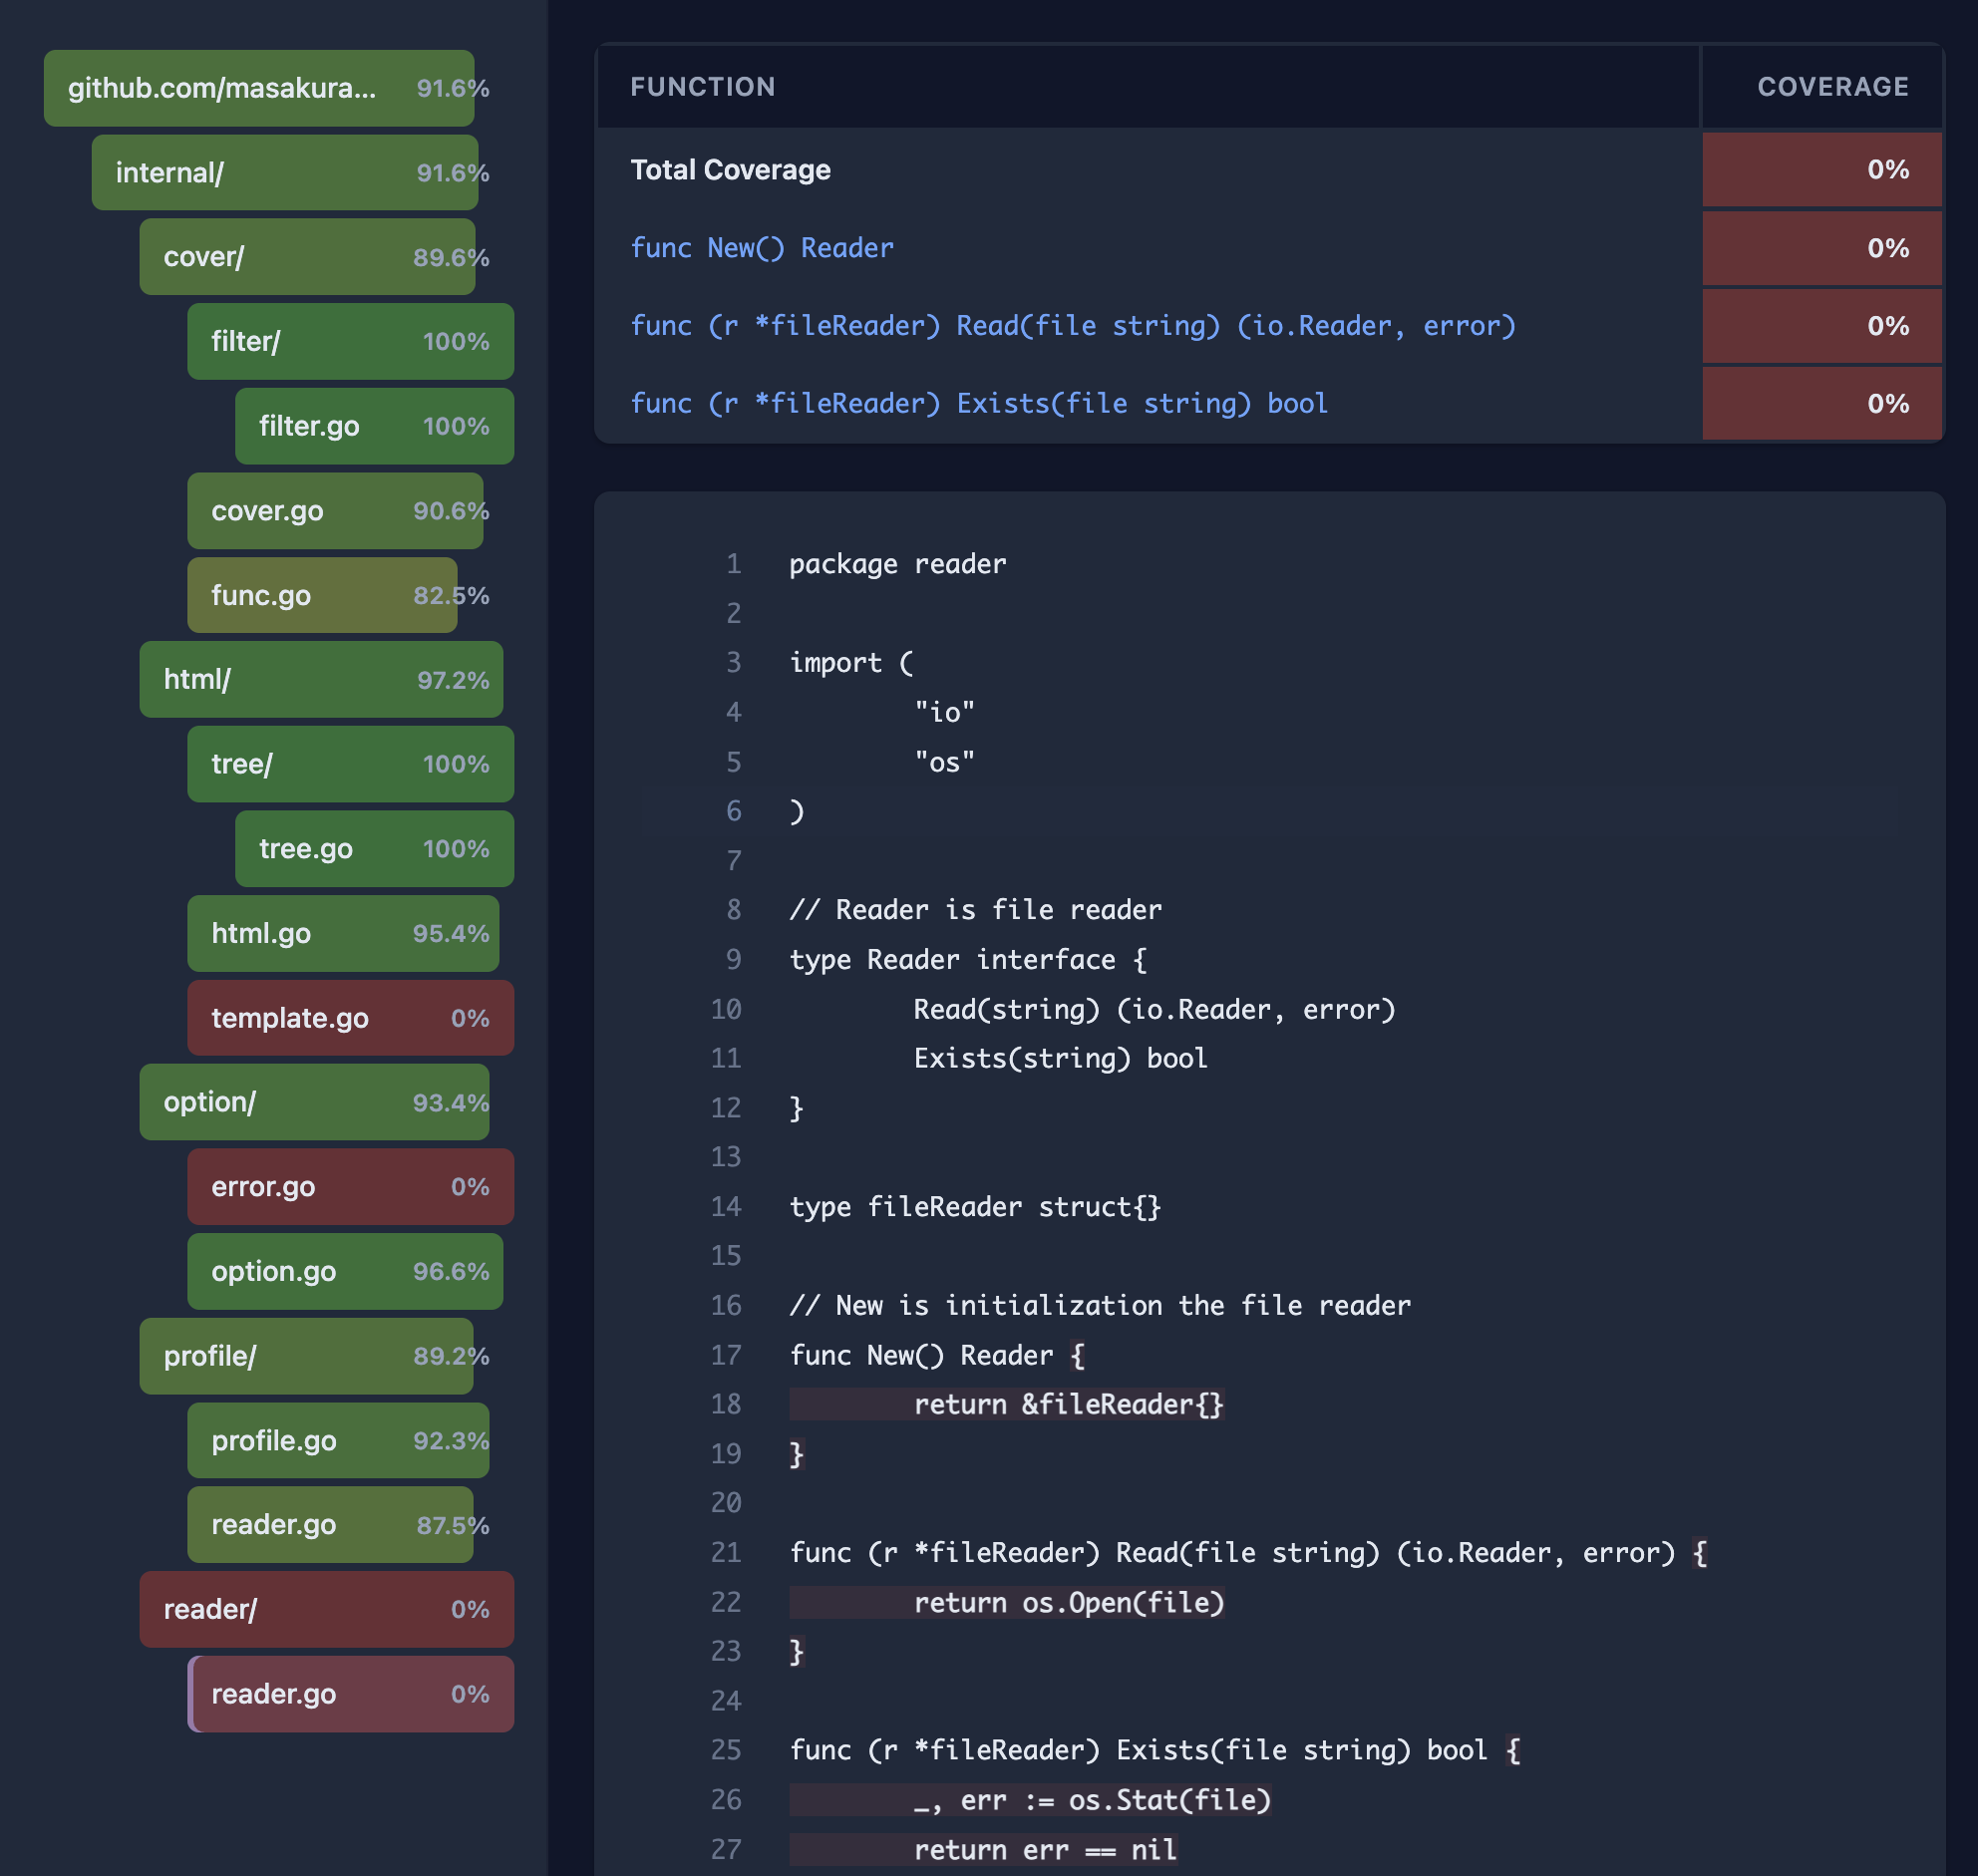
gover-html に font-family を指定する PR を出した`go tool cover -html` の出力が素朴すぎるのでもう少しリッチな表現をしてくれるツールないかなぁと探していた。 探していたところ、[gocov]( + gocov-html が良さそ2025-07-04(Fri)
-
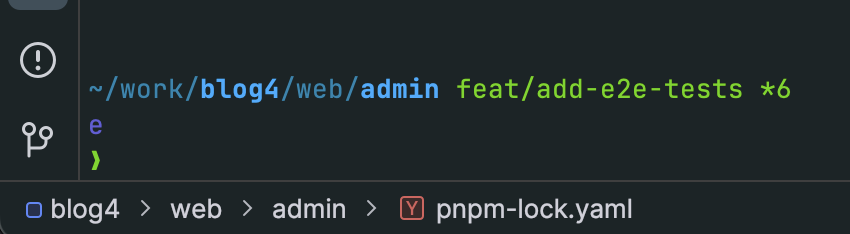
Jetbrains IDE の左下のパスっぽいやつは Navigation Bar という名前2025-06-27(Fri)
-
pgx.Connect は thread safe ではない> failed to deallocate cached statement(s): conn busy pgx/v5 で上記みたいなエラーが出まくったばあいは、`pgx.Connect()` を2025-06-26(Thu)
-
PostgreSQL で sqlc を使うときは、最初から `sql_package: pgx/v5` を指定しようsqlc+PostgreSQL では [COPY Protocol]( を使って複数行のインサートをする機能が提供されている。 これはめちゃくちゃ便利で,例えば以下のようなクエリがあったとする。2025-06-26(Thu)
-
Zod> TypeScript-first schema validation with static type inference2025-06-22(Sun)
-
エレコム 旅行用 圧縮袋 パッキングキューブ Mサイズ 12L 24×34×14㎝ 両面収納 コーデュラ 高耐久YKK製ファスナー採用 ブラック BMA-TRCS01MBK2025-06-21(Sat)

-
knative serving とknative のバージョンごとに対応している k8s のバージョンが違う。2025-06-20(Fri)
-
sqlc で INTERVAL するときの書き方PostgreSQL前提。 `WHERE created_at < NOW() - INTERVAL $1` みたいな書き方すると、$1 が整数とされる上に、名前が Column1 とかになってしま2025-06-19(Thu)
-
Aqua Voicemac のアプリなのだが、音声認識の精度が高いらしい。気がむいたら試してみたい2025-06-18(Wed)
-
僕には鳥の言葉がわかる2025-06-17(Tue)

-
jawiki-kana-kanji-dict を直したなんかよくわからんけど lindera-cli のオプションが微妙に変わってて動かなくなってたので修正。2025-06-10(Tue)
-
KeyScripten を tauri 2.0 に対応させたtauri 1.0 から 2.0 への移行、まぁまぁ大変。。 ```bash npm install @tauri-apps/cli@latest npm run tauri migrate `2025-06-08(Sun)
-
Go開発に最適な構成:TypeSpec + ogen + sqlc + orval + MSW + Docker Compose + Taskfile で爆速プロトタイピング最近、**Go(Golang)** の開発プロジェクトでは以下のような構成を採用していて、開発体験がかなり快適になっている。 * API定義:**TypeSpec** * バックエンド生成:**og2025-06-06(Fri)
-
typespec で utcDateTime を使ってるときに example を書く方法``` @example(#{ created: utcDateTime.fromISO("2020-01-01T00:00:00Z") }) model Entry { @encode(Da2025-06-05(Thu)
-
go のテストの結果を見やすくするには gotestsum が便利golang 初心者として日々を過ごしておるわけですが、`go test ./...` とかしたときに結局どれが FAIL したのかわからなくて目 grep することになって辛かった。 そういう場合2025-05-28(Wed)
-
本好きの下剋上を読破した思ったより綺麗に話がまとまっていて面白かった。 最初はドクターストーンみたいな話かと思って読み始めたけど全然違ったわ。2025-04-03(Thu)
-
さくらのクラウド検定 v1.0 に合格した2025-03-28(Fri)

-
Biome 2.0 では Plugin が書けるPlugin が GritQL という DSL で書けるようになるとのこと。 GritQL を知らなかったが、AST 検査を DSL でやるっていうのは最適化が出来そうで面白いね GritQL2025-03-26(Wed)
-
Wolfenstein Youngbloodナチスと戦うFPS。 2人協力プレイゲームだけど、わりといい感じにAIが動いてくれるのでソロプレイでも普通に遊べる。 ステルスにパラメーター振って遊んでもいいし、脳筋で遊んでもいい。結局、ボス戦は脳筋2025-03-23(Sun)
-
s3surferREADME にコマンド例がのってなかったけど以下でインストール出来る。 ```sh go install github.com/hirose31/s3surfer/cmd/s3surfer@lat2025-03-18(Tue)
-
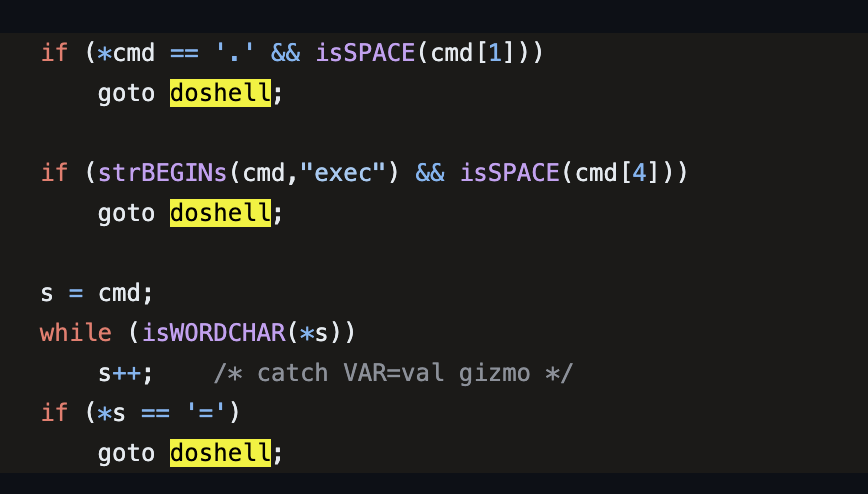
Perl5 の system でシェルが実行される条件2025-03-11(Tue)
-
backstopjsビジュアルリグリッションテストが出来るツール。 最近仕事で sphinx のバージョンアップをしていたのだが、バージョンアップしたらどのように変わるかを判定するために利用した。 めっちゃ便利。2025-03-07(Fri)
-
tview - golang 用の TUI ライブラリtcell をベースにしているらしい 最初、chatgpt がオススメしてきた textual - Python 用の TUI ライブラリ を使ってみたのだが、どうも細かい仕様が微妙だったので2025-03-07(Fri)