-
sphinx の検索に unicode normalization を導入するパッチを書いたsphinx-doc は全文検索機能を自前で実装している。現在、文字種の正規化機能がないため、例えば `IP` と書いてあったときに `IP` というキーワードで検索出来なかったりする。 近年では2025-02-24(Mon)
-
Obsidian のライセンス変更の件> Starting today, the Obsidian Commercial license is optional. Anyone can use Obsidian for work, f2025-02-21(Fri)
-
com.github.johnrengelman.shadow は com.gradleup.shadow に変わっていた> Previously this plugin was developed by @johnrengelman and published under the ID com.github.joh2025-02-20(Thu)
-
BOOX GoColor7 買った2025-02-18(Tue)

-
ASGIAsynchronous Server Gateway Interface。 WSGI の非同期対応版。2025-02-18(Tue)
-
Mac で mise install php する方法```sh brew install autoconf automake bison freetype gd gettext icu4c krb5 libedit libiconv libjpeg l2025-02-14(Fri)
-
Evidencean open source framework for building data products with SQL だそうで。 SQLを書いた markdown をもとに、データソースから2025-02-13(Thu)
-
rye より uv という話rye よりも uv のほうが良いらしい。 でも、mise を使い始めた ので、両方今使ってないのだった。2025-02-12(Wed)
-
Task を go get -tool で入れる```sh go get -tool github.com/go-task/task/v3/cmd/task@latest ``` とかして入れる。 ```sh go tool task ```2025-02-12(Wed)
-
mise を使い始めた色んなインタープリタなどのインストールは必要なわけだが、、 anyenv, asdf などあるのは知っていたが色々入れてたのだが、mise を使い始めた。 体験がいいかも。 ```sh brew2025-02-11(Tue)
-
パスキーのすべて、を読んだ2025-02-09(Sun)

-
Markdown でスライドを書ける Marp を使い始めた最近は AI が全盛だよねえというところもあり、テキストで生成できるツールでスライドを作るようにしようかなぁと思って Marp を使うようにしてみた。 前職のときはスライドを Box で共有できること2025-02-08(Sat)
-
Redis の lua で printf debug する方法Redis または Valkey では lua を使うのが便利なわけだが、デバッガがまぁまぁダルい。 printf debug するには以下のようにする。 ```lua redis.log(redi2025-02-07(Fri)
-
arc42 by Examples2025-02-06(Thu)

-
arc42 - Architecture 文書のテンプレートドイツで流行ってるっぽいアーキテクチャ文書のテンプレート。 必要十分なフォーマットだと思う。 Diagrams.net Integration for IntelliJ の文書がこのフォーマッ2025-02-06(Thu)
-
BOOX Go 7 Color を買った2025-02-06(Thu)

-
Diagrams.net Integration for IntelliJdiagrams.net(旧称: draw.io) を intellij の中で書けるんだけど、オフラインで動作する。 で、foo.dio.svg/foo.dio.png みたいなファイル名だった2025-02-04(Tue)
-
Java 用の File Leak DetectorJava agent として動作するとのこと。 > In addition, upon a "too many open files" exception, this agent will du2025-02-04(Tue)
-
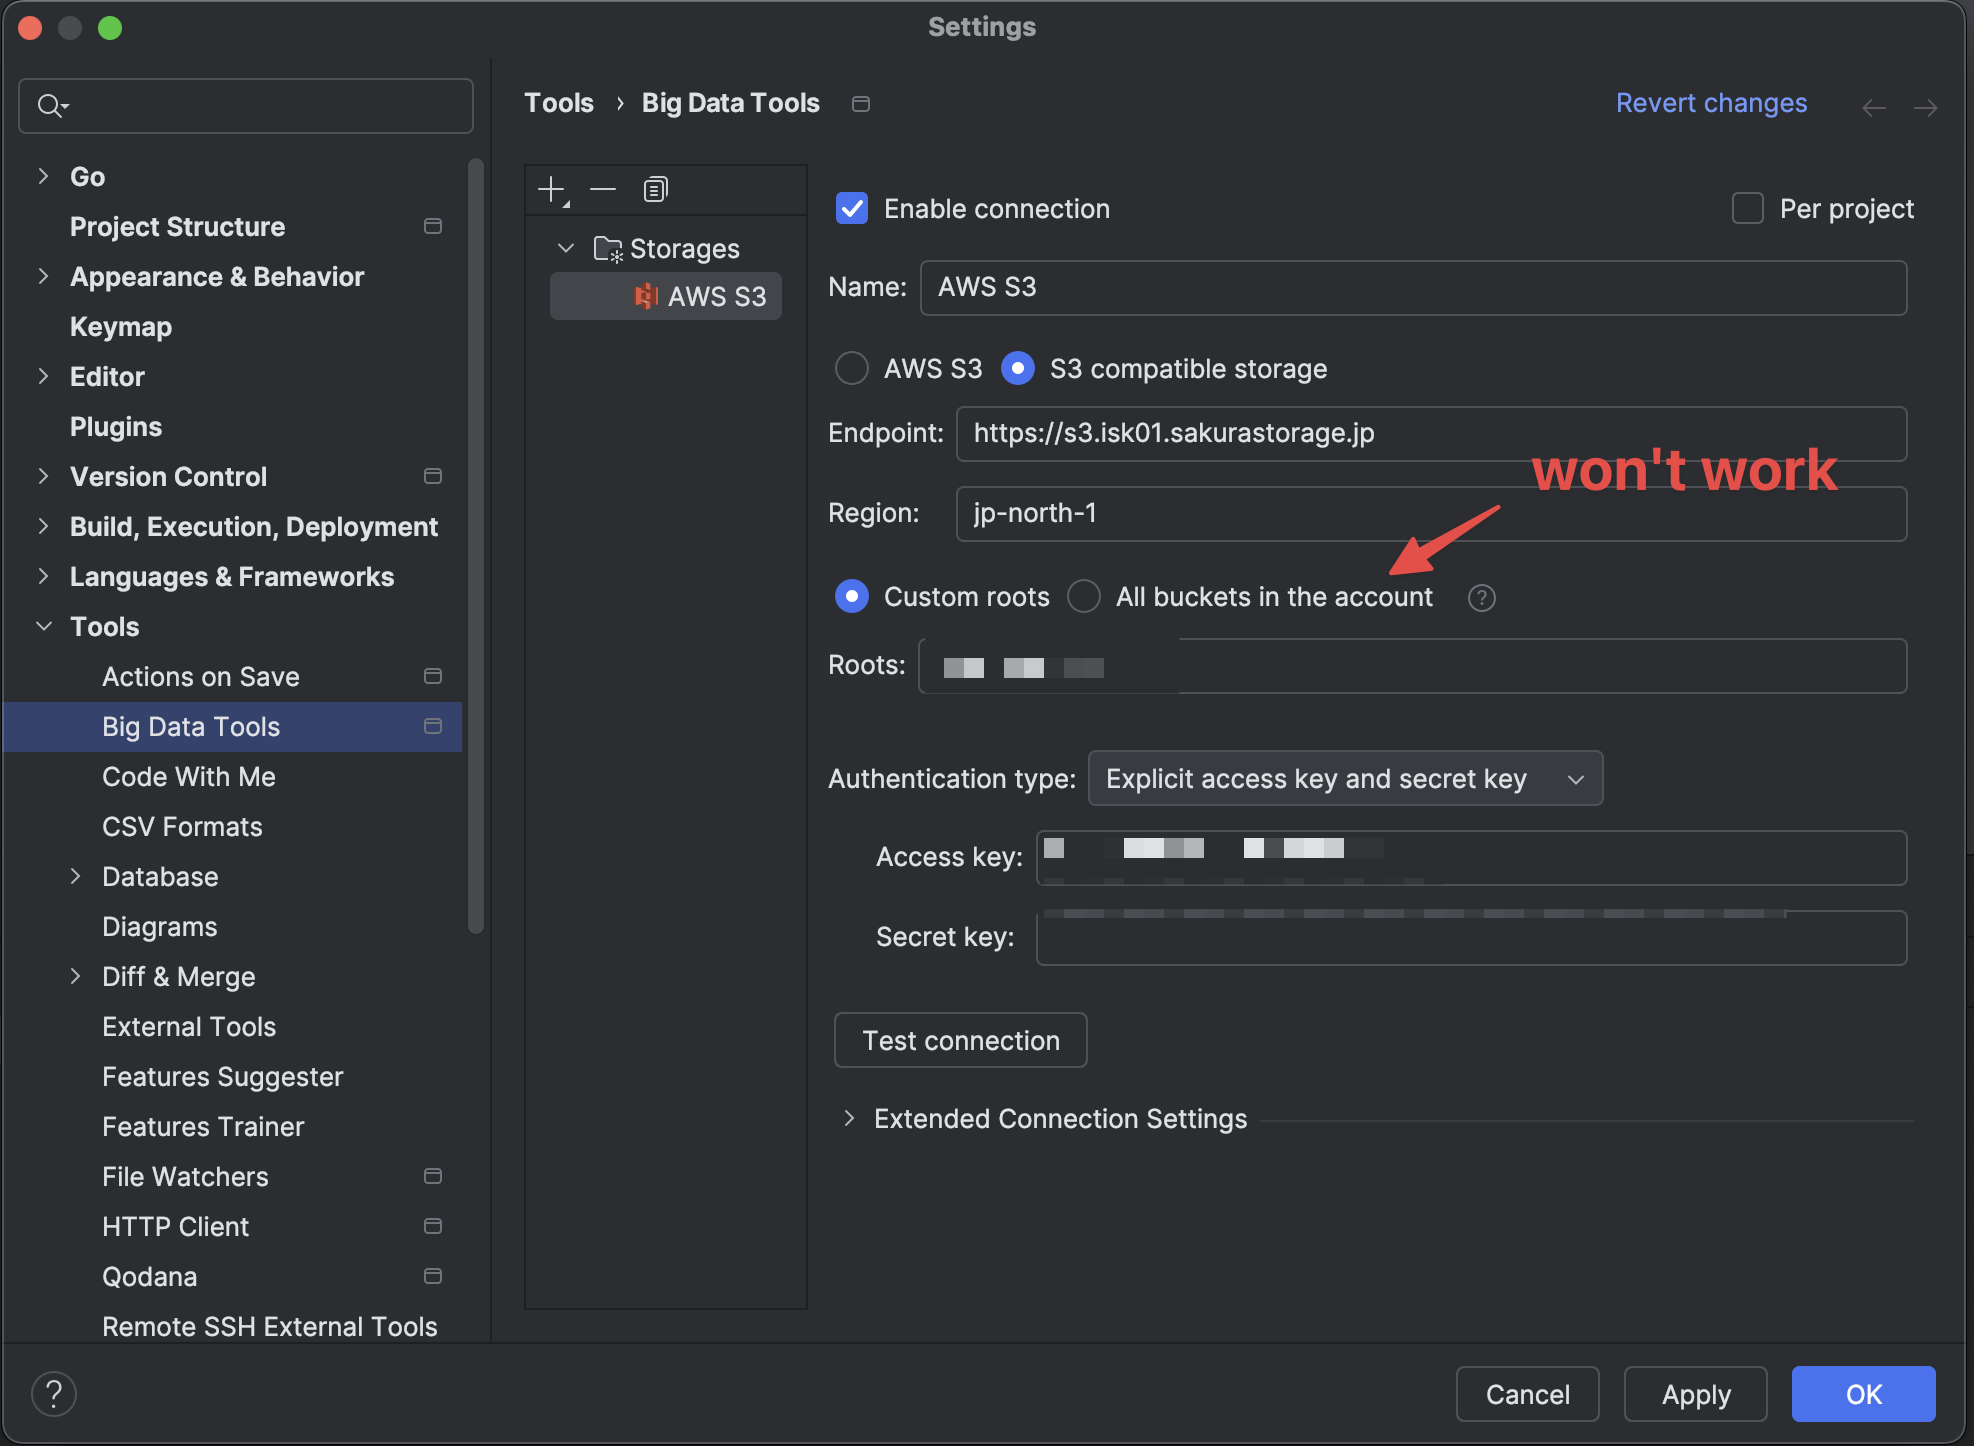
さくらのオブジェクトストレージに GoLand 等からアクセスする方法2025-02-03(Mon)
-
コロンビア オークハーバー2 を買った2025-02-02(Sun)

-
github の通知を mac でスッと受け取りたい# gitify なんか GUI アプリとしての作り込みがちょっと甘いかも。 普通の mac アプリっぽい挙動になってないところがある。 あと、 github.com のアカウントの同期をしたあと2025-02-02(Sun)
-
gorilla/feedsgolang の RSS 生成ライブラリ。blog4 で採用しようかなと。 普通に使いやすくて良い感じ。2025-01-31(Fri)
-
プログラミング関連ドキュメントをオフラインで閲覧出来る devdocs が便利だったzeal が mac で使えないので他の dash alternative を探していたら、devdocs.io が良さそうということがわかった。 `brew install --cask dt2025-01-30(Thu)
-
zealdash みたいなドキュメントビューアー。無料で使えるっぽい。 Dash が有料なので、zeal 良いかもなぁとおもって見ていたら、Mac では使えないらしい。 windowsとlinuxで使える2025-01-30(Thu)
-
仕事用のメモを logseq 使うようにした結局、logseq で良いかなぁ、と。 git commit を自動的にしてくれる機能もあるんで、commit はそれで自動的にやらせつつ git push だけ cron で実行するようにする。2025-01-30(Thu)
-
jetstream + LAMY 届いた2025-01-29(Wed)

-
Chrome Web Store for Enterprise 7> 企業の従業員などが、IT部門などがあらかじめ許可したGoogle Chromeの拡張機能の一覧を参照し、必要に応じてChromeブラウザにインストールできる新サービス これは、機微な個人情報2025-01-28(Tue)
-
SRE Kaigi 2025 に参加した2025-01-27(Mon)
-
新しいリュックを買った2025-01-26(Sun)

-
Topo Mini - めっちゃ良い感じのスタンディングデスク用マット2025-01-25(Sat)

-
入門Opentelemetry2025-01-24(Fri)

-
fish を設定する2025-01-24(Fri)
-
yaegi で golang でスクリプトを書くちょっとしたスクリプトも golang で書きたい。というか、圧倒的に golang 力が足りて無くて困るので、golang を頑張って使っていかなければならないんですよねえ。 というわけで、g2025-01-23(Thu)
-
httpdumpd - http でリクエストされたものをなんとなく stdout に dump するやつperl でサラッと。 ```perl #!/usr/bin/env perl use strict; use warnings; use Plack::Request; use Plack::Ru2025-01-23(Thu)
-
bun の s3 サポートをさくらのオブジェクトストレージで試すbun が s3 をネイティブサポートした。 さくらのオブジェクトストレージ は S3 互換なので、bun から直接使えるようになったハズである。 というわけで使ってみる。 ```js i2025-01-23(Thu)
-
REST APIのインテグレーションテストにpactumjsとvitestを選んだ理由REST API があって、その品質を確認するためにインテグレーションテストを手厚く書きたいと思った。 その際に色々検討したのだがその記録である。 ### `vitest`のメリット - **高2025-01-23(Thu)
-
iPhone SE3 用 ケースを買った2025-01-22(Wed)

-
fujiwara tech conf #1 に参加していた久々に会う人々と旧交を温めたり。 fujiwara ware って基本的に AWS 用のものが多いんで、private cloud 人間だった僕にはあまりなじみが無かったのだが、ecspresso2025-01-21(Tue)
-
SootUpSoot の後継。 Java コード/バイトコードの静的解析ライブラリ。2025-01-19(Sun)
-
JustJustfile なる設定ファイルを用いて、コードを実行する。 依存を管理しない Makefile といった感じ。IntelliJ IDEA でいうところの .run ファイルに近いかも。2025-01-18(Sat)
-
facebook のレコメンドがくどすぎるので非表示にする chrome 拡張を書いた表題の通り。 「フォローする」とか「参加する」とかのリンクが入ってるのを消す。 最近レコメンドが多すぎて辛いので。。2025-01-17(Fri)
-
neovim で golang を LSP できるようにするneovim の最近のバージョンだと LSP はネイティブサポートされている。 neovim の LSP の便利な設定集であるところの をインストールする。 vimplug を使っているので以下の2025-01-16(Thu)
-
raycast の port manager で、特定のポートを listen しているプロセスを kill する5673 ポートを握ってるプロセスを kill したい、なんてことが raycast から簡単にできる。 便利。2025-01-15(Wed)
-
expr-lang- - golang で実装された式言語。DSL 的に使われている。 Java の世界でいうところの SpEL 的な立ち位置っぽい。2025-01-14(Tue)
-
brew leaves で実際に自分でインストールしたアプリを取得するbrew list すると、homebrew でインストールしたアプリを取得することが可能だが、依存で入ってきたアプリもリストアップされてしまう。 そんなときは `brew leaves` を使う。2025-01-14(Tue)
-
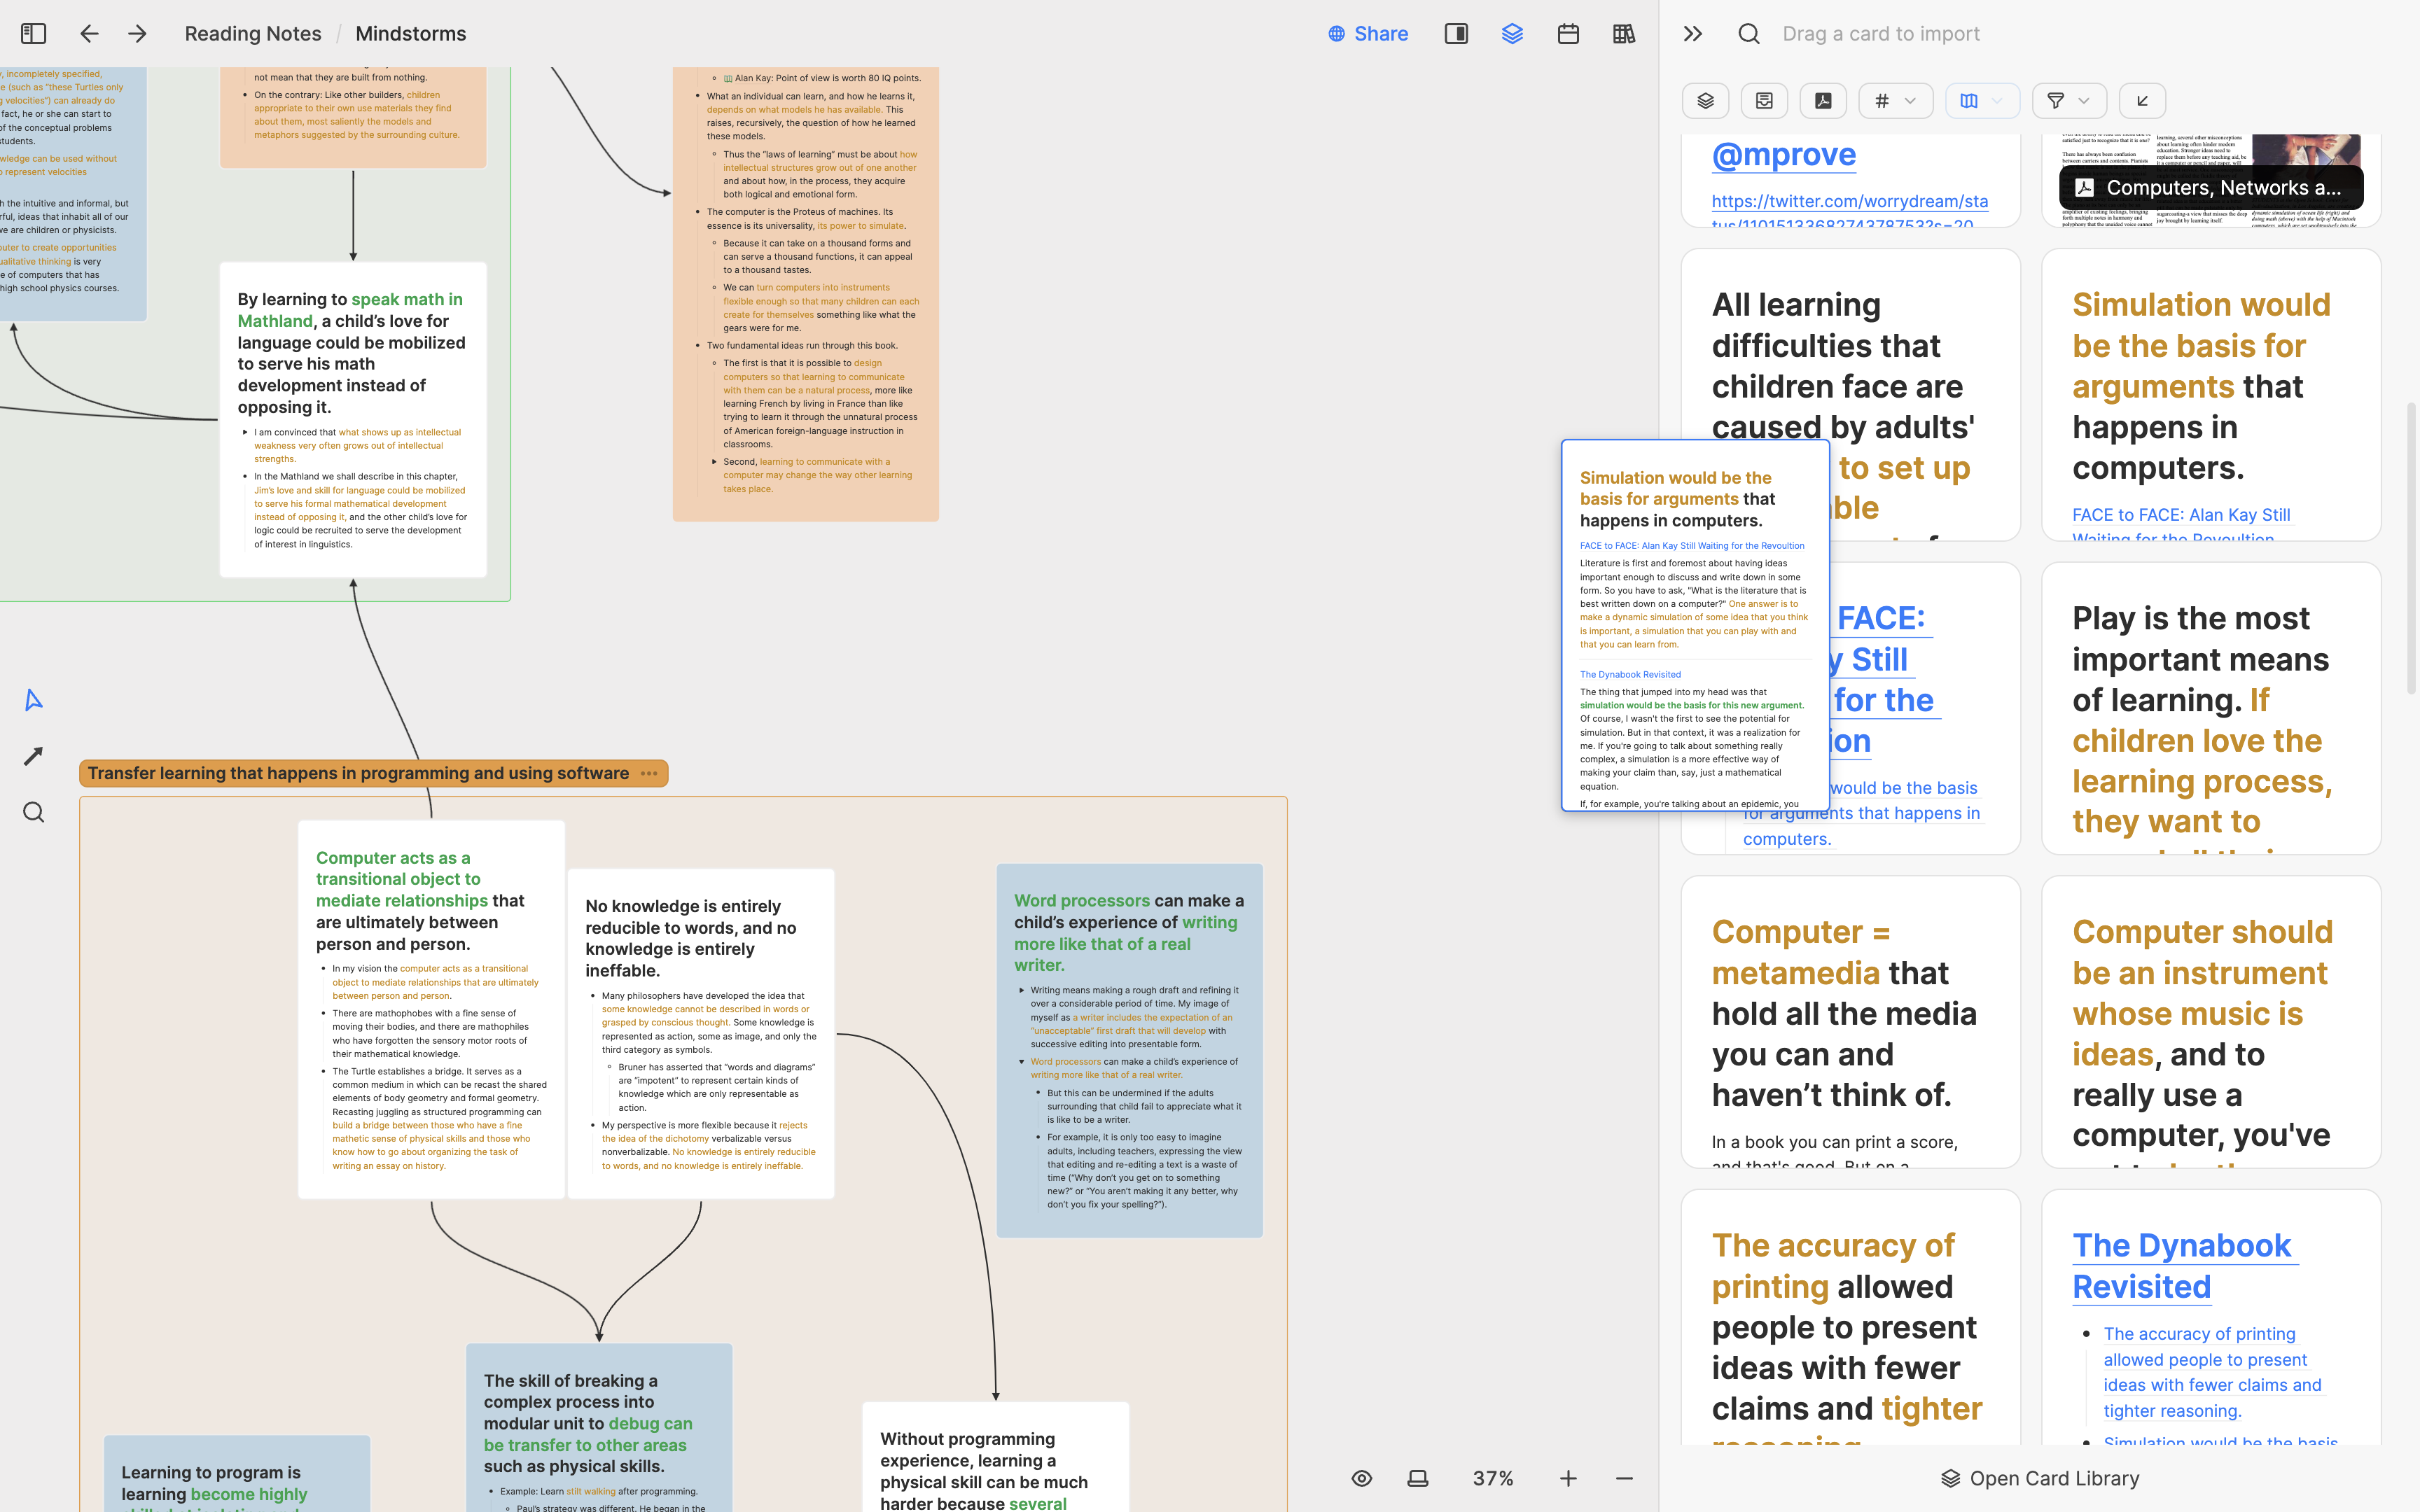
Heptabase2025-01-12(Sun)
-
sky.appbluesky クライアント。完全とは言えないが、、そこそこ動く。サッとポストできる。 - cmd-shift-R Refresh - enter Write new post が2025-01-12(Sun)
-
btm2025-01-11(Sat)

-
非同期で動くプロンプトの pure を使うことにしたpure は starship より速い、とteppeis さんが言っている。 で、今までは遅いと感じてなかったのだが、歴史あるレポジトリのディレクトリに入ったところめっちゃ遅いと感じたの2025-01-10(Fri)
-
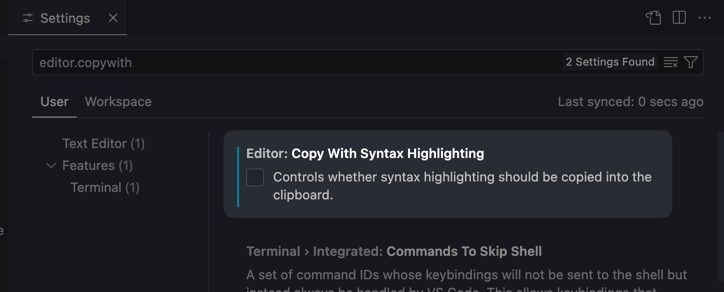
Visual Studio Codeでシンタックスハイライトなしでコードをコピーする方法2025-01-09(Thu)
-
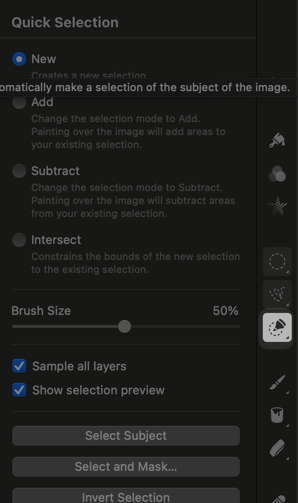
私が育てました、の雑コラを Pixelmator Pro で作る方法2025-01-09(Thu)
-
neovim で url を開くには URL の上で "gx"最近、転職したこともあって neovim を使うようにしてみているのだが、 URL をブラウザで開くようにしたかったがどうやったらいいかがわかってなかった。 "gx" と打てば良いだけでした。 本2025-01-08(Wed)
-
alt-tab で command key を設定出来ない~と思って悩んだ話alt-tab で command-tab を設定して前はつかってたはずなのに、なぜか command-tab を設定できない!!と思って悩んでいた。 のだが、非常に単純なはなしで、左 command2025-01-08(Wed)
-
さくらインターネットに入社しました昨年の 10月ごろに X こと twitter で @tagomoris から DM が来て誘われたので、2025年1月からさくらインターネットに入社しました。 --- 転職エントリーってあんま書2025-01-08(Wed)
-
starship を導入したzsh のプロンプトが簡素すぎたので導入! ```shell brew install starship ``` して ```shell if command -v starship >/de2025-01-08(Wed)
-
Brewfile を自動生成するようにしたhomebrew で入れているアプリが多岐にわたっており、管理が難しくなっていた。 そこで、Brewfile を自動生成するようにした。 今入っているアプリを Brewfile に書き出してくれる。2025-01-08(Wed)
-
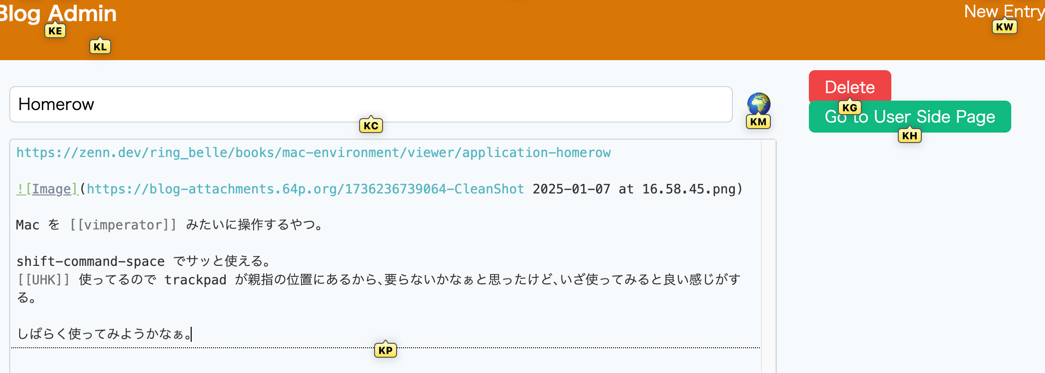
Homerow2025-01-07(Tue)
-
Clean Shot XSkitch の代替アプリ。 `brew install cleanshot` で入る。 有料なのがちょっとあれだけど、スクロールしながら撮影できたりして便利。2025-01-06(Mon)
-
何人も判断するよりはむしろ信ずることを願うセネカ の言葉。 ショーペンハウエル の 読書について で引用されていた。2025-01-05(Sun)
-
科学者とあたま2025-01-05(Sun)
